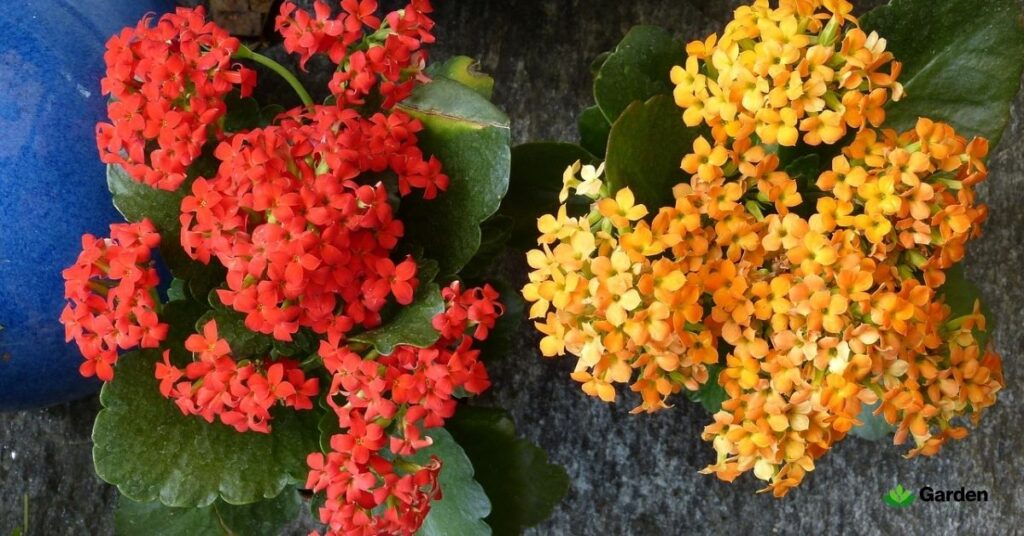
If you’ve ever walked past a plant with wildly colorful leaves—maybe bright pink, fiery red, or electric yellow—and thought, “What is that?”—chances are, you were looking at abromeliad. These tropical showstoppers are having a major moment in thehouseplant world, and for good reason. They’re visually stunning, surprisingly easy to maintain, and they bring that exotic vacation vibe right into your living space.
I’ll never forget my first experience with a bromeliad plant. It was sitting on a clearance rack at my localgarden center, looking somewhat neglected with droopy foliage. The cashier warned me it was “temperamental,” but something about its vibrant magenta center caught my eye. Fast forward six months, and not only was it thriving—it had produced three baby plants! That’s when I discovered: bromeliads aren’t difficult. They just need you to understand their natural growth patterns and care requirements.
So, whether you’re a complete beginner or you’ve struggled with houseplants before (no judgment here), this comprehensive guide will walk you through everything you need to know aboutbromeliad plant care. Trust me, by the end of this article, you’ll feel confident enough to fill your home with these gorgeous tropical plants.
What Exactly Is a Bromeliad?
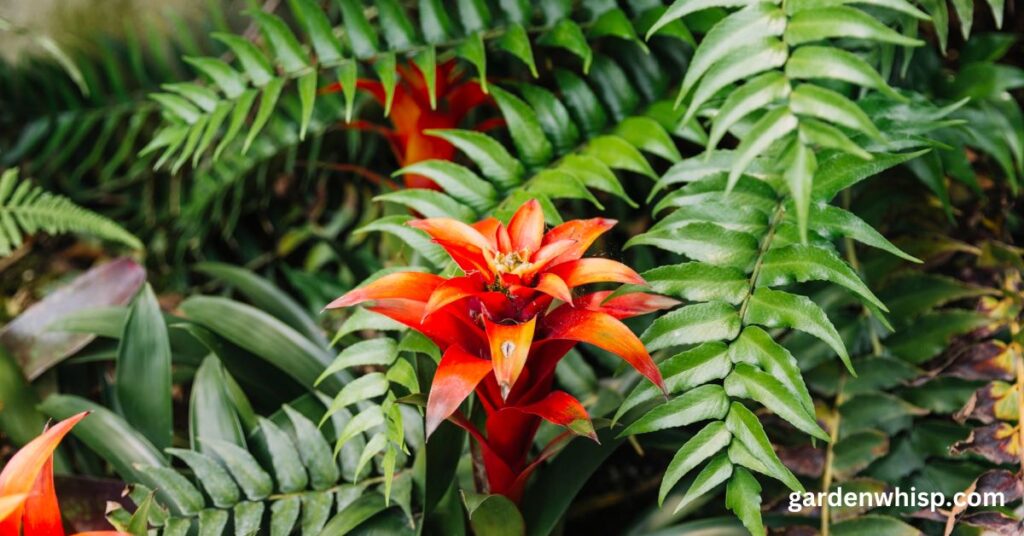
Before we dive into bromeliad indoor care specifics, let’s talk about what makes these plants so unique. Bromeliads belong to the Bromeliaceae family, which includes over 2,500 species. You might be surprised to learn that pineapples are actually bromeliads! So is that romantic Spanish moss you see draping over trees throughout the American South.
Most bromeliad species originate from the tropical regions of Central and South America, where they grow inrainforests. Interestingly, many of them are what we callepiphytes—plants that grow on other plants (like trees) rather than in soil. Don’t worry though, they’re not parasites. They simply use trees as a convenient perch while they collect water and nutrients from the air and rain.
This unique bromeliad growth cycle is exactly why bromeliad care for beginners is different from your typical houseplant routine. Once you understand their natural habitat, everything else just falls into place.
Best Light for Bromeliad Plants: Finding That Perfect Spot
Here’s the thing about bromeliad light requirements: they prefer it bright but not too direct. Think of it like this—in their natural environment, they’re growing under the canopy of taller trees. They receive plenty of filtered sunlight, but they’re not sitting in the blazing midday sun.
Step-by-Step: Positioning Your Bromeliad for Optimal Light
- Find a bright spot near a window—ideally one facing east or west
- Keep it a few feet back from the window to avoid direct afternoon sun
- Watch the leaves as your guide: if they start looking pale or stretched out, they need more light
- Rotate the pot every few weeks so all sides get equal light exposure
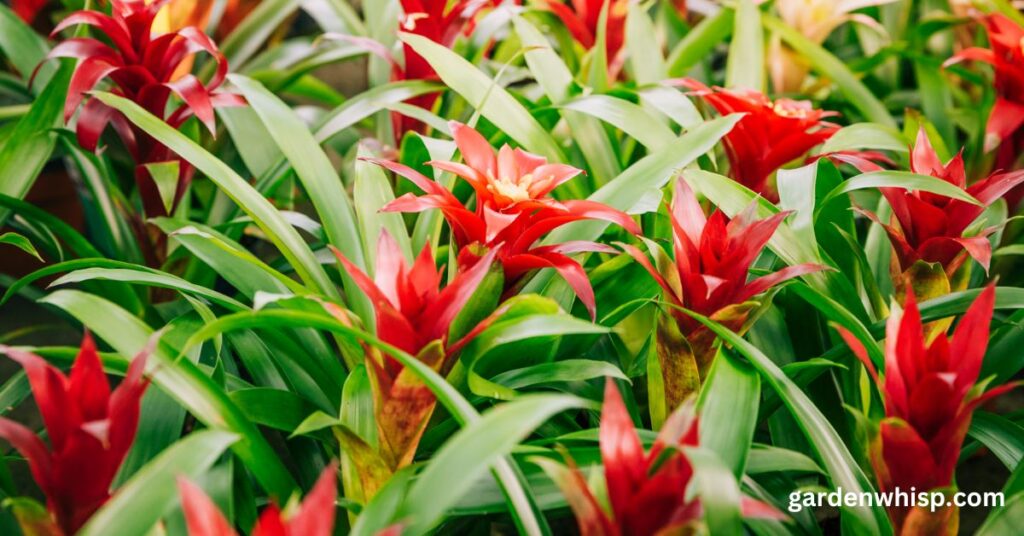
However, not all bromeliad varieties are created equal. The general rule? The softer and greener the leaves, the less direct light they need. Meanwhile, those spiky, colorful varieties like Neoregelias can handle a bit more direct sunlight. If your bromeliad’s leaves are thick and rigid—almost succulent-like—you can push the light levels a bit higher.
One thing I learned the hard way: during winter months when daylight is scarce, don’t be afraid to move your plant closer to the window. I once watched my beautiful Guzmania lose all its vibrant red color because I forgot to adjust for the season. As soon as I moved it to a brighter spot, the color came roaring back within weeks.
Understanding Bromeliad Light Requirements for Different Varieties
Different bromeliad types have varying light preferences:
- Aechmeas: Prefer bright indirect light
- Tillandsias (Air Plants): Can tolerate brighter conditions
- Guzmanias: Thrive in medium to bright indirect light
- Neoregelias: Can handle more direct sunlight than most varieties
How to Water Bromeliads: The Cup Method Explained
This is where bromeliad houseplant care gets really interesting—and honestly, quite fascinating. Many bromeliads feature a central cup-like structure created by their tightly arranged leaves. In nature, this cup collects rainwater, fallen leaves, and even the occasional insect, which the plant uses for nutrition. At home, this cup becomes your primary watering target.
How Often to Water a Bromeliad: Complete Instructions
Understanding how often to water a bromeliad depends on several factors including season, humidity levels, and plant variety.
Step 1: Fill the central cup with water (not the soil!) using water or rainwater if possible.Tap water can contain minerals and chemicals that bromeliads don’t appreciate.
Step 2: Keep the cup about one-quarter to one-half full at all times during the growing season.
Step 3: Every 10 days to two weeks, dump out the old water and refill with fresh water. This prevents bacterial growth and keeps things clean.
Step 4: Water the potting soil lightly every one to two weeks in summer, and every two to three weeks in winter. The soil should be slightly moist but never soggy.
Bromeliad Watering Needs by Season
Your bromeliad watering schedule should adjust with the seasons:
- Spring/Summer: Water every 1-2 weeks; keep cup 1/2 full
- Fall/Winter: Water every 2-3 weeks; keep cup 1/4 full
Here’s an anecdote that might save you some heartbreak: My friend Sarah was so excited about her first bromeliad that she watered it excessively—filling the cup, soaking the soil, misting it daily. Within a month, the poor plant had root rot and the leaves were turning brown. Bromeliads are surprisingly drought-tolerant because of their special hair-like structures called trichomes that help them absorb moisture from the air. Less is definitely more when it comes to bromeliad watering needs.
Also, a pro tip: if your bromeliad is flowering, use slightly less water in the cup. Too much water can cause the beautiful flower spike to rot prematurely, and nobody wants that!
Bromeliad Potting Mix: Choosing the Right Soil Type
Since most bromeliads are epiphytes in nature, they need a bromeliad soil type that mimics their tree-dwelling lifestyle. Translation: they need excellent drainage and lots of air pockets around their roots.
Best Bromeliad Potting Mix Options
You have several excellent choices for bromeliad potting mix:
- Cactus or palm potting mix works wonderfully because it’s designed for low-water plants
- Orchid bark mix is perfect since orchids and bromeliads have similar soil requirements
- DIY mix: Combine regular potting soil with orchid bark, perlite, and a handful of worm castings for nutrition
- Commercial bromeliad mix: Available at most garden centers
Whatever you choose, the key is that water should drain through quickly. If you pour water into the pot and it sits there for more than a few seconds, your mix is too heavy and needs more drainage material.
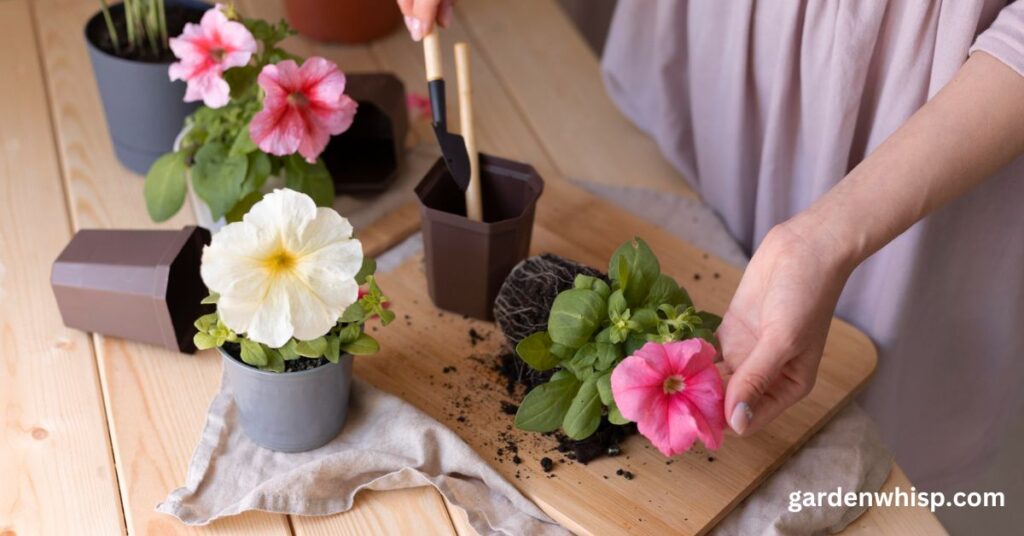
When to Repot Your Bromeliad
Good news: bromeliads have small root systems, so you won’t need to repot them often. Every four to five years is usually plenty. When you do repot:
- Choose a pot only one size larger with multiple drainage holes
- Spring and summer are the best times to do this, as the plant is actively growing then.
- Be gentle with those delicate roots
- Water lightly after repotting and keep out of direct sun for a few days
Bromeliad Humidity Levels and Temperature Range
Since bromeliads hail from humid tropical regions, they appreciate some moisture in the air. However, they’re surprisingly adaptable and can handle typical home humidity levels (around 40-50%) just fine.
Ideal Bromeliad Humidity Levels
The ideal humidity range for tropical bromeliad care is between 50-75%. If you live in a particularly dry climate or run your heater constantly in winter, your bromeliad will appreciate some extra humidity.
Easy Ways to Increase Humidity
- Mist the leaves once or twice a week with room-temperature water
- Group plants together to create a microclimate
- Use a humidity tray: Fill a shallow tray with pebbles and water, then set your pot on top (not touching the water)
- Place near a bathroom where shower steam naturally increases moisture levels
- Use a humidifier in the room
Bromeliad Temperature Range Requirements
As for temperature, if you’re comfortable, your bromeliad is comfortable. They tolerate a wide range from the 60s to 90s Fahrenheit (15-32°C). Just keep them away from cold drafts and heating vents. The ideal temperature range is 65-80°F (18-27°C).
Bromeliad Fertilizer Schedule: Less Is Definitely More
Here’s where bromeliad plant maintenance gets even easier: these plants don’t need much fertilizer at all. In fact, over-fertilizing is one of the quickest ways to damage them.
How to Fertilize Bromeliads Properly
If you want to give them a nutritional boost, wait about a month after bringing your plant home, then use an orchid fertilizer diluted to half-strength. The best method? Mist the leaves with the diluted fertilizer rather than pouring it into the soil or cup.
Recommended bromeliad fertilizer schedule:
- Spring: Apply once with diluted liquid fertilizer
- Summer: Apply once more if desired
- Fall/Winter: No fertilization needed
Do this maybe once in spring and once in summer, and your bromeliad will be perfectly happy. Remember, in nature, these plants survive on whatever organic matter happens to fall into their cups—they’re not heavy feeders.
Bromeliad Care After Flowering: Understanding the Life Cycle
Here’s something important to know upfront about how long do bromeliads live: after a bromeliad flowers, the mother plant will slowly begin to die. I know, I know—it sounds sad. But wait! Before she goes, she’ll produce “pups” (baby plants) at her base. This is a natural part of the bromeliad growth cycle.
What to Do When Your Bromeliad Blooms
Understanding bromeliad flowering care is crucial for long-term plant health:
- Enjoy the show! Bromeliad flowers can last several months
- Reduce water slightly in the cup to prevent the bloom from rotting
- Cut off the flower stalk once it completely fades, cutting as close to the base as possible
- Watch for pups appearing around the mother plant
Bromeliad Pups Care: Growing the Next Generation
This is one of my favorite parts of bromeliad care indoors. The bromeliad mother plant and pups relationship is fascinating. Once the pups are about one-third to one-half the size of the mother plant (usually after a few months), you can separate them:
Step 1: Gently wiggle the pup to see if it has its own root system
Step 2: Use a clean, sharp knife to cut the pup away from the mother at the base
Step 3: Plant the pup in its own small pot with fresh bromeliad potting mix
Step 4: Water lightly and keep in bright, indirect light
Before you know it, you’ll have a whole family of bromeliads—and trust me, there’s something deeply satisfying about successfully propagating a plant.
Bromeliad Lifespan and Growth Expectations
Understanding how long do bromeliads live helps set realistic expectations:
- Mother plant lifespan: 3-5 years before flowering
- After flowering: 6-12 months before dying
- Pups to maturity: 1-3 years before flowering
- Total cycle: Can continue indefinitely through pups
Common Bromeliad Problems and Solutions
Even though bromeliads are relatively low-maintenance, you might encounter a few issues. Here’s a guide to troubleshooting common problems.
Bromeliad Leaves Turning Brown: Causes and Fixes
Problem: Crispy or curling leaf edges Cause: Plant is thirsty; underwatered Solution: Increase watering frequency and ensure the cup stays filled
Problem: Brown tips on leaves Cause: Salt buildup from tap water or over-fertilizing Solution: Switch to filtered or rainwater and cut back on fertilizer
Problem: Yellowing leaves with wet potting mix Cause: Classic case of overwatering Solution: Let the soil dry out completely before watering again and check that your pot has good drainage
Bromeliad Plant Not Flowering: How to Encourage Blooms
If your bromeliad isn’t flowering, try these techniques:
- Increase light exposure: Move to a brighter location
- Use the apple trick: Place a ripe apple near the plant; the ethylene gas it releases can trigger flowering
- Be patient: Some varieties take 3-5 years to mature before flowering
- Check temperature: Ensure plant is in the ideal temperature range
Other Common Bromeliad Problems
Loss of color: Not enough light. Move your bromeliad to a brighter location, and the vibrant colors should return.
Pests: While rare, you might see mealybugs, scale, or spider mites. Wipe them off with rubbing alcohol on a cotton swab. Avoid oil sprays which can clog the trichomes.
Rotting base: Too much water in soil. Ensure excellent drainage and reduce watering frequency.
Bromeliad Care Indoors and Outdoors: Seasonal Transitions
Understanding bromeliad indoor plant care tips versus outdoor care helps you maximize your plant’s health throughout the year.
Indoor Bromeliad Care Tips
- Position near bright windows but away from direct afternoon sun
- Maintain consistent temperatures between 65-80°F
- Increase humidity during winter heating season
- Rotate plants regularly for even growth
- Keep away from cold drafts and air conditioning vents
Moving Bromeliads Outdoors
Once nighttime temperatures in your area are consistently above 60°F (15°C), it’s safe to move a bromeliad you’ve been growing indoors outside for the summer.
Hardening off process:
- Keep them in a protected area for several days to help them adjust.
- Gradually increase sun exposure over a week
- Move to their final outdoor location
- They’ll do fine with morning sun but need shade from baking afternoon rays
Tropical Bromeliad Care in Different Climates
- Tropical/Subtropical zones (10-12): Can grow outdoors year-round
- Temperate zones: Bring indoors before first frost
- Desert climates: Need extra humidity and partial shade
- Cold climates: Best grown as houseplants exclusively
Why Bromeliads Make Perfect Houseplants
After years of bromeliad plant care, I’ve come to appreciate why they’re such fantastic additions to any home:
- They’re forgiving: Miss a watering? They’ll probably be fine thanks to their drought tolerance
- They’re pet-safe: Unlike many houseplants, bromeliads are non-toxic to cats and dogs
- They’re long-lasting: The colorful bracts can stay vibrant for months
- They multiply: Free baby plants? Yes, please!
- They’re conversation starters: Guests always ask about these unique plants
- Low maintenance: Perfect for busy lifestyles
- Air purifying: Help clean indoor air naturally
Ready to Start Your Bromeliad Journey?
If you’ve made it this far, you’re clearly serious about learning how to care for a bromeliad plant—and that’s awesome! These plants truly are special. They bring vibrant color, unique texture, and that tropical resort feeling into any space, whether it’s a drab office cubicle or a cozy bedroom.
The best part? Now that you understand what bromeliads need—bright indirect light, water in the cup, well-draining potting mix, and minimal fussing—you can confidently add one (or several) to your plant collection. They’re incredibly rewarding plants that actually show you when they’re happy with vibrant colors and steady growth.
Frequently Asked Questions About Bromeliad Care:
How often should I water my bromeliad plant?
Water your bromeliad every 1-2 weeks in summer and every 2-3 weeks in winter. Fill the central cup with filtered or rainwater, keeping it about 1/4 to 1/2 full. Water the soil lightly, ensuring it stays slightly moist but never soggy. Empty and refill the cup every 10 days to prevent bacterial growth.
Why are my bromeliad leaves turning brown?
Brown leaf tips usually indicate salt buildup from tap water or over-fertilizing. Switch to filtered or rainwater and reduce fertilizer use. If the edges are crispy and curling, your plant is underwatered—increase watering frequency. Brown, mushy leaves with wet soil signal overwatering and possible root rot.
Do bromeliads need direct sunlight?
No, they prefer bright, indirect light. Place near east or west-facing windows, a few feet back. Direct afternoon sun can burn leaves, while too little light causes color loss.
What happens after a bromeliad flowers?
The mother plant dies after flowering but produces “pups” (baby plants) first. Cut off the faded flower, wait for pups to reach 1/3 mother’s size, then separate and pot them.
How long do bromeliad plants live?
Individual plants live 3-5 years before flowering, then die within 6-12 months. However, the pups ensure continuous growth, so your bromeliad family can live indefinitely through multiple generations.